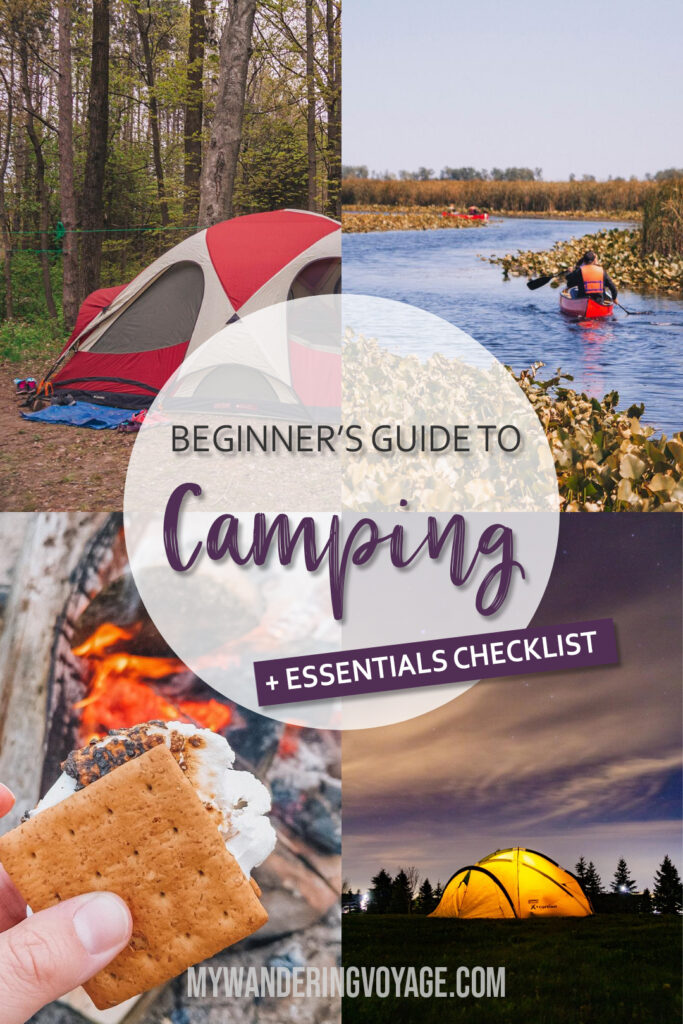
Camping is such a quintessential Canadian summer activity. But if you’ve never been camping before but want to give it a go, then this beginner’s guide to camping is for you. In this guide, you’ll find a list of car camping essentials, how to set up your campsite, camping recipes, camping etiquette and more.
NOTE: Travel is not recommended at this time. These posts are here to serve as inspiration when we can explore again. Hey there – this post likely contains affiliate links, which means I earn a commission (at no extra cost to you) if you purchase from them. This helps me earn a few dollars to run this website.
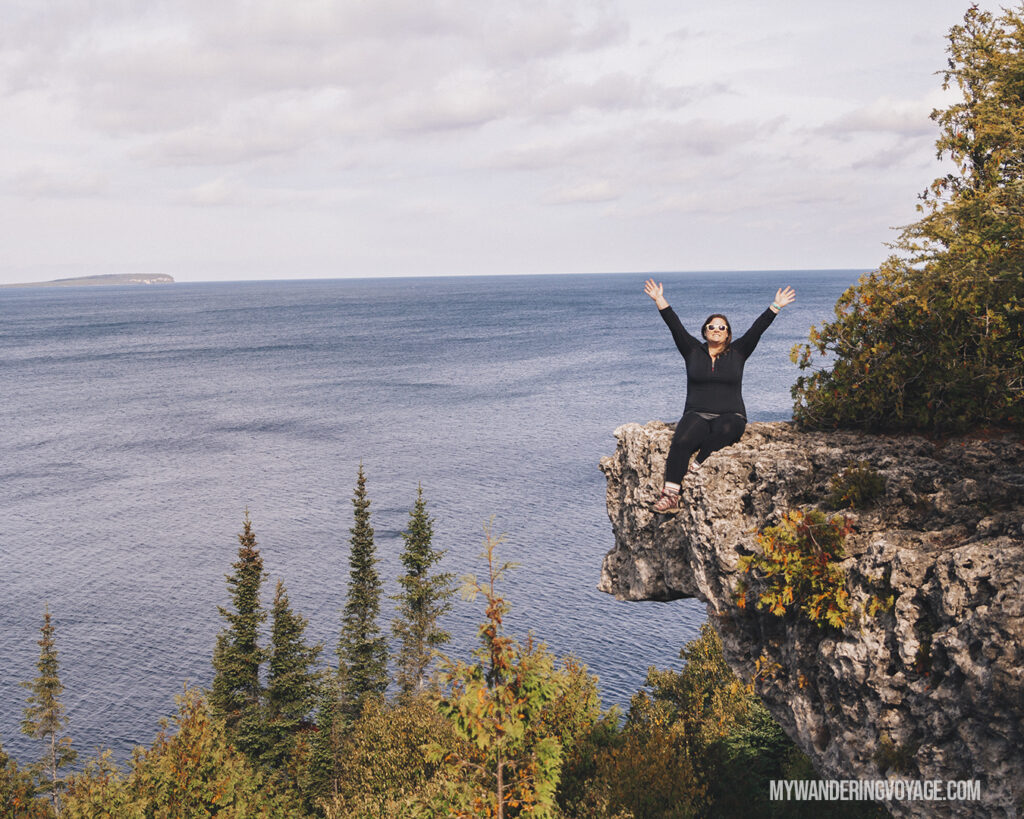
Camping has always been such an important part of my summer, ever since I was a child. My dad and I would often go on an army-style camping trip in the most random places, and my family would go camping with another family almost every summer. I love sleeping in a tent, hiking outside, swimming in lakes.
I totally understand that camping can be overwhelming if you’ve never done it before, so that’s why I created this beginner’s guide to camping so that you’ll know exactly what you’re getting into when you head into the great outdoors.
Where to camp in Ontario and Canada
Figuring out where you want to camp is step number one in this beginner’s guide to camping. There are so many different styles:
- Car camping (aka. front country camping) is where you use your car or RV to pull right into a camping spot. Most spots for front country camping are equipped with a picnic table, fit pit and plenty of room for a few tents or an RV. Some sites even have electrical hookups. I’m going to be focusing on front country camping for most of this guide.
- Backcountry camping is where you hike (or paddle) to your camp spot that is usually not maintained by staff. Some backcountry sites have some amenities, like an outhouse, but I’d say most don’t have any facilities at all. Backcountry camping is a whole other ball game that needs a bit of experience, so if you’re a beginner, try car camping first!
- Glamping is great for those without a lot of equipment. There are places to glam that you don’t need to bring anything but food, and others where you’ll get a shelter, bed and mattress, but you’ve got to bring everything with you. Ontario Parks offer yurts and cabins as roofed accommodations in parks, and Parks Canada has oTENTiks, which are like a permanent tent.
Find a place that has something you’d like to do, whether that’s hiking or lounging on a beach or paddling on a lake. You can use Ontario’s Park Locator to find a provincial park near you. There are also six national parks in Ontario AND hundreds of conservation areas that offer camping. Conservation areas often get overlooked, but some are just incredible!
RELATED: Best Ontario Parks to visit in the Winter
Learn to Camp with Ontario Parks and Parks Canada
Both Ontario Parks and Parks Canada offer Learn to Camp programs for people starting out.
Parks Canada has a whole YouTube playlist for everything from setting up a tent to starting a fire. And Ontario Parks has a resource centre with tips on how to camp.
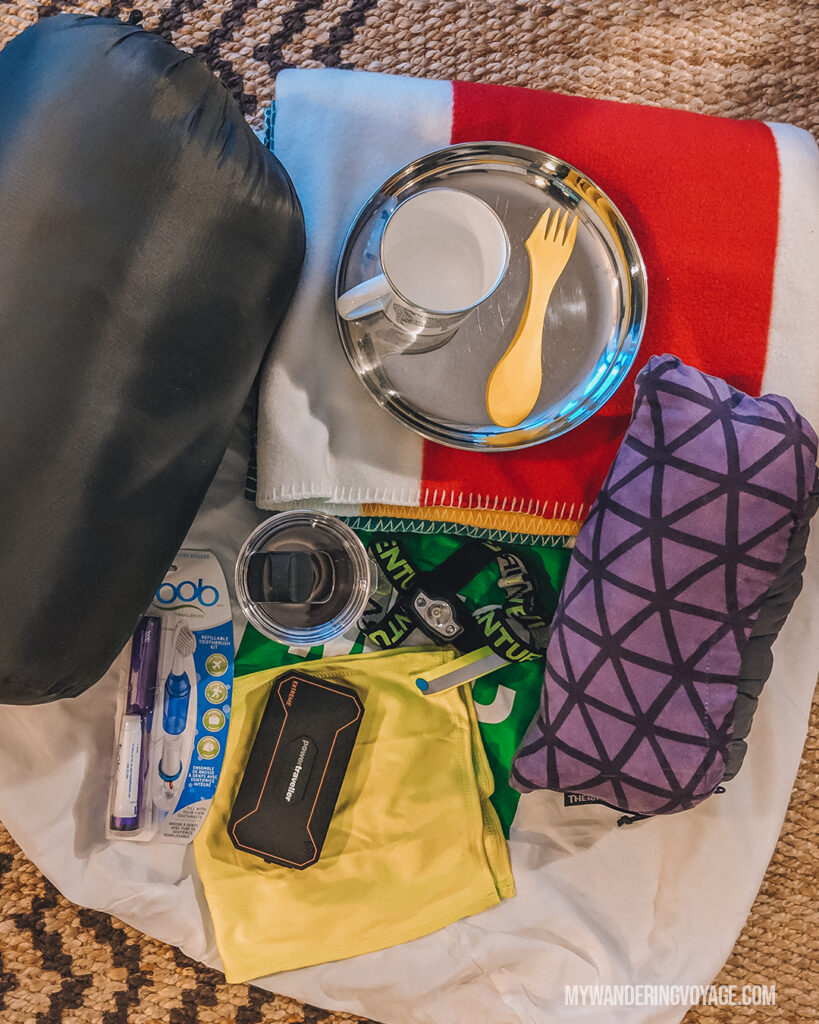
Car Camping Essentials
Now that you know where you want to camp let’s talk about car camping essentials. I mean, this is a beginner’s guide to camping, so we gotta talk about gear! Below you’ll find a camping essentials checklist printable that you can download for free!
Where to buy
But before we talk about gear, just know there are expensive and inexpensive camping gear. Some things, like a good quality tent and sleeping bag, are key to a good camping trip, but other things like aluminum foil, kitchen utensils, tarps and stuff like that can be found cheap at Amazon or even the dollar store.
I’ve tried to provide links to where you can buy things at MEC (a Canadian co-op equipment store), Canadian Tire (surprisingly cheap camping gear), Amazon (remarkably affordable) and REI (a US co-op equipment store.
Sleeping
The most crucial piece of your camping set up is your tent, followed by your sleeping bag. This beginner’s guide to camping will show you how to choose a tent and sleeping set up that’s right for you, plus other items to make your camping trip nice and cozy.
Tent

Picking the right tent is essential. You’ll want to consider its season rating, which means how many seasons you can use it in. A three-season tent is perfect for a beginner who may only use it for summer weekends.
Think of how many people will be sleeping in the tent. A four-person tent means four people side by side can fit in it, but if you have things, like backs or large air-mattresses, it might be too cramped. Plus, you might want some extra room to move around in.
Think of the height. Dome tents are usually short, so you can’t quite stand up in them, but they’re simple and easy to put up. Consider how many doors you’ll need, whether it has proper ventilation and if it comes with a rainfly. You’ll need it.
Here are a few good options from MEC, Canadian Tire, Amazon and REI.
Sleeping pad
My parents were in the military, which meant camping trips were bare minimum. The sleeping pad we used? Army grade – a self-inflating foam square, about the thickness of two fingers. Tech has improved since then, and picking the right sleeping pad is easier than ever.
There are self-inflating sleeping pads, ones that have a valve that you unscrew when you unroll it, and it inflates for you. Just remember to close the valve when you jump into bed. (Find a self-inflating sleeping pad at MEC | Canadian Tire | Amazon | REI)
There are blow-up pads, ones that use the power of an air pump or your lungs. They can be thin and light, or thick and comfortable. These types are great for backcountry camping because they fold up so small. But they can be noisy to sleep on if you toss and turn in the night. (Find a blow-up pad at MEC | Canadian Tire | Amazon | REI)
Air mattresses are the norm for car camping since they are much bulkier and require a pump to inflate. But they can keep you up off the ground and comfortable. Just remember if you have a sizeable blow-up mattress, you have to fill it somehow, so you’ll need a pump. (Find an air mattress at Canadian Tire | Amazon)
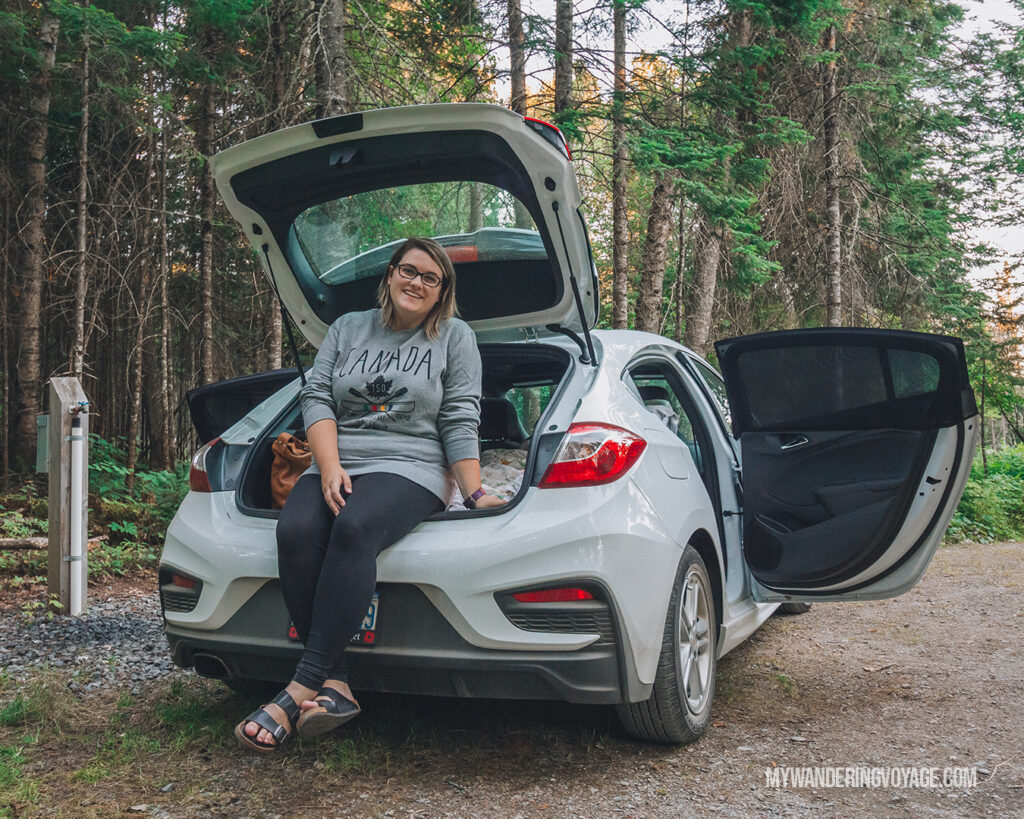
Lastly, consider a trifold mattress for your next car camping adventure. They are much bulkier than anything on this list, but man, they are the most comfortable. I picked one up when I went on an east coast road trip where I slept in my car. And boy, I’ve never been more comfortable. I’ve convinced several friends to pick one up to, and now it’s our go-to camping accessory. (Find a trifold mattress at Amazon.)
Pillow
I used to bring my camp pillow until I thought one day, I’m in a car, I can easily bring my comfortable pillow. So, I did, and I haven’t looked back. If you’re looking for a packable pillow, you can find one at MEC | Canadian Tire | Amazon | REI.
Don’t forget:
- a tent footprint to keep your tent dry and free of abrasion
- a sturdy rain tarp
- rope for your tarp
- a dustpan/ brush
- an outdoor rug
Clothing
- Shower shoes: If you decide to use the shower, you’re going to want shower shoes you don’t mind getting wet.
- Sandals: Birkenstocks are awesome camp shoes. They’re great for slipping into when you need to go pee in the middle of the night.
- Hiking shoes or trail shoes: Make sure you get the right ones because sore feet only halfway into a hike is no fun at all.
- Comfortable clothing: like sweatpants, sweater and wool socks for night time warmth, and light, loose shirts and pants for the day time. I LOVE MEC’s timeless pants since they are perfect for camping. I have one in every colour.
- PJs: makes sleeping super comfortable
- Outer layers: Check the forecast, you might want to bring some extra sweaters or a rain jacket!
- Hat: Ball caps are my new essential hiking and camping item. They keep the sun out of your eyes, prevent you from getting burnt on your forehead or scalp, and can cover up 4-day dirty hair!
- Sunglasses: If you’re not a hat person, then bring along some shades to protect your eyeballs.
- Bathing suit: If you’re going to jump into a lake or a river, you’ve going to need a bathing suit.
- Dry bag/ wet bag: A dry bag is perfect for protecting your stuff in the rain or when you’re on the water. A wet bag is great for stuffing your damp bathing suit in so it doesn’t soak everything else
- Water shoes: it makes jumping into a lake much more enjoyable when you can touch the bottom and not feel the slime, or if it’s a rocky bottom
Toiletries
- Bug spray: Keep those pesky bugs away.
- Reef safe sunscreen: buy sunscreen that won’t harm the waterways
- SPF lip balm: save your lips from soreness with SPF lip balm
- Body wipes: For when you can’t jump in the lake, these are helpful
- Toothbrush and Toothpaste: Remember, toothpaste is super smelly for wildlife. Consider tablets or keeping it packed away in the car.
- Quick-dry towel: Microfibre towels are the best for travel and camping since they absorb a lot and dry quickly
- Face cloth: Or a washcloth for lake bathing (NO SOAP ALLOWED!)
Campsite Essentials
- Camp chairs: trust, me you’ll want to bring some for sitting around the fire.
- Lantern: needed for late-night game playing
- Headlamp: Needed for late-night washroom breaks
- First Aid Kit: Do not skip over a first aid kit. Seriously. You never know when you’ll need it
- Outdoor blanket: Get a cozy blanket for sitting around the fire.
- Camping games: My favourites are Ravine, Bananagrams, Dutch blitz, these folding magnet games, and finally, a good old deck of cards.
- Axe: For chopping wood if you need more kindling. But, like, be careful with it.
Camp kitchen
Your camp kitchen can be as straightforward or as elaborate as you want. It all depends on what you want to cook. For me, I like to keep it simple (and so does this beginner’s guide to camping), cooking only over the fire, and using the stove to boil water for coffee and tea.
Cooler
First, let’s talk about the most important camp kitchen item: the cooler.
There are three different kinds of coolers: Softshell, hard shell and electric coolers
Softshell coolers: The softshell coolers are perfect for day trip outings since they don’t keep food cold for more than a few hours. But they are small and light. (Canadian Tire | Amazon)
Hardshell coolers: These basic coolers are hardy, mostly light to carry, and come with a bunch of accessories. Some have wheels, some have handles, some have cupholders, some are bear-proof. Either way, this type of cooler is best for your everyday camping experience. (Canadian Tire | Amazon)
Electric coolers: Electric coolers are great for long road trips since you’ll have to keep them plugged in to keep cold. They are more expensive and are usually smaller. Just remember to unplug it from your car when you turn your vehicle off, or you’ll drain your car battery. (Canadian Tire | Amazon)
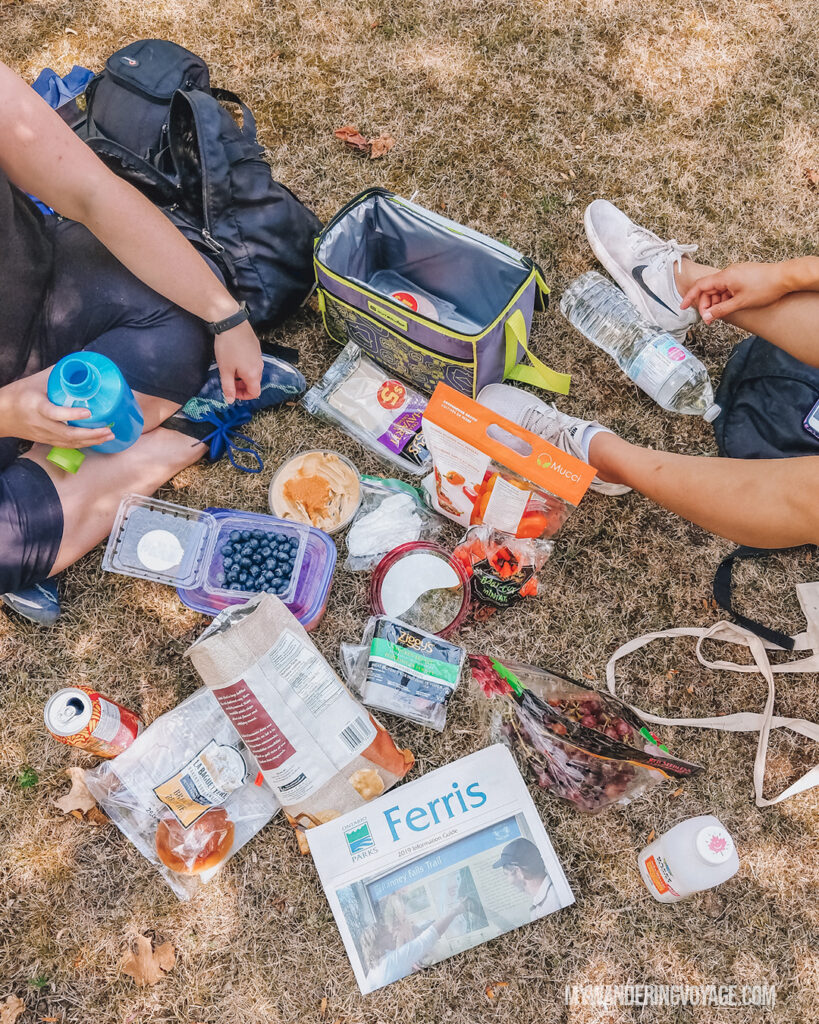
How to pack your cooler
Now that you’ve chosen your cooler let’s figure out how to pack it for the optimal coolness.
On the bottom layer is where you want your cold source. You can use ice, but that will eventually melt and make everything in the cooler wet. You can also freeze water bottles and place them in a row at the bottom; that way, you’ll get the chilly temperatures, but not the mess. You can also place any beverages, like juice, on this layer too.
Next, place your meals that need to be cold, like meat, cheese, etc. Lastly, place any crushable food like eggs, fruits and veggies on the top.
To keep your food cold longer, keep your cooler in the shade, don’t open it frequently, and don’t drain the meltwater unless you really need to.
Camp kitchen essentials
Here are my suggestions for a simple and easy camp kitchen set up:
- Cutting board: A simple plastic one (or a couple to separate your meats and veggies) will do just fine!
- Knives: a sharp set to cut food
- Scissors: You never know when you need them, so it’s better to have than not.
- Camp dish kit: If there’s only one or two of you camping, then I suggest this great kit (MEC | REI), which has a plate, cutting board, bowl, container, cup and spork all-in-one. If there are more people, or if you’re a family, I’d pick up a picnic dishes set.
- Spork: One or two per person. Just wash and re-use
- Coffee Mug: An insulated coffee mug is WORTH IT. I love my yeti mug; it keeps things hot for hours!
- Jet boil stove: As I said, I like to keep things simple, which is why I like a jet boil stove since it quickly boils water, which is really what I use it for. But you could use it for heating up things in a pan or put a small frying pan on top. It’s great for couples or solo campers.
- Camp stove: If you’d rather go all out when it comes to camp cooking, then a camp stove is for you. They are usually two-burner flat stoves that are super simple to use.
- Propane: If you want to bring a jet-boil stove or a camp stove, then you’re going to need propane. Some camp stores have some for sale.
- Cast iron skillet or hardy frying pan: if you want to put a pan over the campfire, then you’re going to need a hardy pan. Cast iron is best, but it does require some extra care. You can also pick up a hardy bottomed frying pan, but know that they will wear out faster.
- Silicone pan grip: The best thing since sliced bread for over-the-fire-cooking.
- Pot/ Kettle: Pick up a pot or a kettle for boiling water
- Pour-over coffee maker with a reusable filter: Perfect for that morning cup of coffee. You could also (gasp) use instant coffee if you’re trying to pack light!
- Grilling tools: you’ll want stuff like a spatula, tongs and a spoon
- Roasting forks: For the perfect hot dog or marshmallow.
- Oven mitt or gloves: Helpful for pulling foil packs or pans off the fire
- Aluminum foil: Lots of it for lots of foil pack dinners.
- Lighter and tinder: You’ll need to start the fire somehow, and unless you want to rub two sticks together, butane lighters are the best way to do it. Also, think of bringing some tinder, like newspaper or a toilet paper roll stuffed with lint.
- Trash bags: for taking out your garbage
- Ziploc baggies: for packing out extra food, holding wet things and really any other use you can think of
- Paper towel: You’ll want this to clean up spills or dry things
- Dishtowel: For drying dishes, of course.
- Water jug: One with a spout will be your best option for camping. You don’t have to bring your own water, as most campgrounds will have drinking water taps. Make sure to check before you leave!
- Soap and sponge: for cleaning up your dishes. Go for fragrance-free soap and keep the sponge in a Ziploc bag.
- Collapsible sink: You could use a plastic tub, but I found that a small collapsible sink was the easiest way to clean and dry dishes if there are lots. If there’s only a few of you, with little to no dishes, then a sink isn’t really necessary.
How to pack for camping
This beginner’s guide to camping gets into the nitty-gritty, so let’s talk about how to pack for camping. There are three main parts of your camping gear – your sleeping set up, your camp kitchen and everything else. You can use a tote bin for all your camp kitchen stuff, like your stove, non-perishable food items, propane, utensils and dishes.
You can use a second tote for your tent, sleeping pad, sleeping bag, pillow, tarps, rope and more. You can also pack everything but the tent and tarps into a loose bag (which helps fit things in your car better) and keep the tent and tarps loose in your car. Up to you.
Lastly, a third tote can be used to keep everything else like lanterns, headlamps, axe, folding chairs, games and any other loose items you may have.
Remember to keep it simple and do what works for you and the space you have!
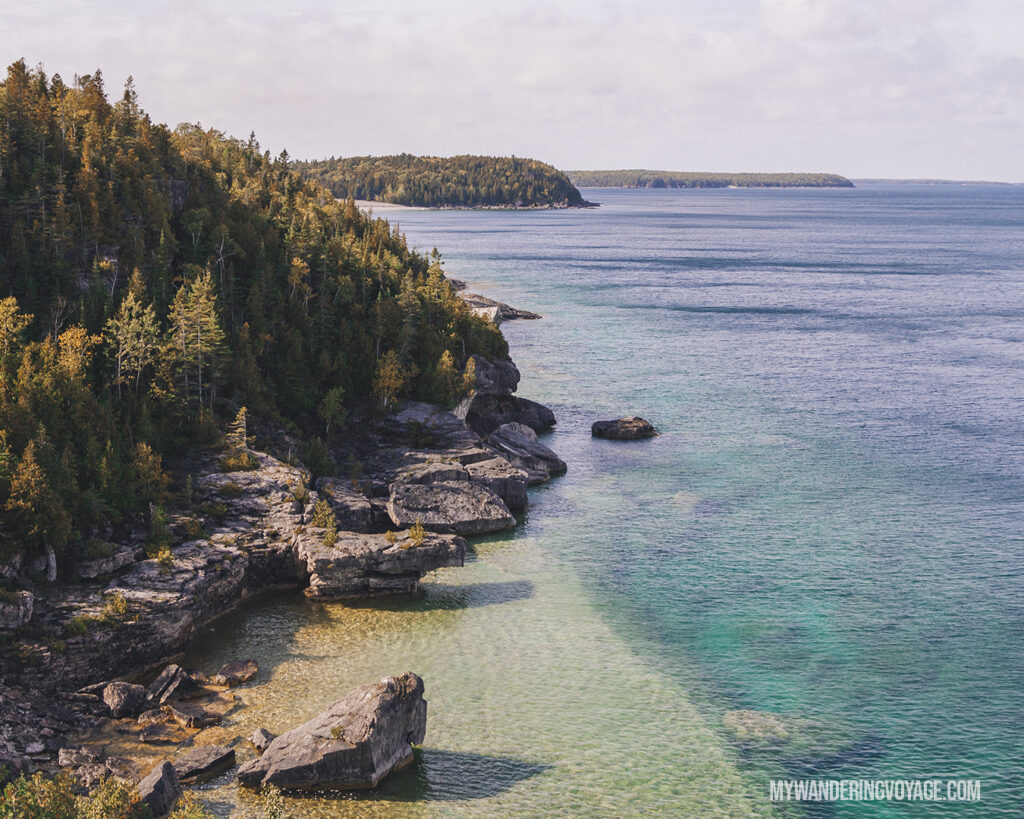
RELATED: The Complete Guide to Tobermory and Flowerpot Island Camping
Beginners Guide to Camping
Alright, now that you know where you want to go, you’ve got your camping essentials all packed, and you’ve driven to your campsite, it’s time to set everything up!
Pick a spot for your tent
Picking the right site for your tent is essential! You’ll want to find a relatively flat area. It’s incredible how much you’ll notice sleeping on an angle, even if it’s slight.
Make sure you’re on the opposite side of the campsite from the firepit. Sparks or embers can be disastrous to a tent. Clear the area of any large stones or pinecones that will be under the tent.
You’ll also want room around the tent to maneuver the poles, pegs and tent lines.
Lay down a tent footprint
First things first, lay down your footprint. This can be the footprint that comes with the tent (if it does), or you can use a tarp. Footprints allow you to stay dry and can protect the bottom of your tent from wearing and tearing.
The trick with a footprint is to have it slightly smaller than the tent. You don’t want anything sticking out so that if it does rain, then it won’t pool on the excess material under your tent.
Set up tent
Ideally, you’ll want to test out setting up your tent at home so that you make sure you generally know how to do it and that you don’t have any broken or missing parts.
The key to setting up your tent is, wait for it, following the manufacturer’s directions. It’s incredible how many people skip looking at the instructions and go straight to trying to set it up. Every tent is different, which means how you set up each tent will be different.
Two things you’ll want to know: 1) Set up the doorway so that you’re not crawling over brush to get out of the tent. 2) use fluorescent trail tape to flag the tent lines. Trust me; you’ll thank me after you nearly clothesline yourself or trip over it in the dark.
Also, don’t skip setting up the fly. You’ll want it to protect you from the wind and rain.
Setting up a tarp
So, let me just say that I’ve only successfully set up a tarp twice, and that was with the brainstorming of three others to find the best way to do it, until I saw this video from Parks Canada. It’s honestly so simple.
You’ll want a large tarp (one larger than the footprint of your tent), a very long rope, four pieces of thinner long rope and some tent pegs.
Using two trees string the long rope between them, using the tension to hold them in place. Fling the tarp over your line so that it’s equal on each side and then tie down each corner to other trees or use the tent pegs to secure them.
I mean, if the forecast doesn’t call for rain, then it’s not a necessary step, but even if there’s the slightest chance of rain, I would put one up. If you plan your campsite right, you can use the same line for your tent and over your picnic table with two tarps!
The trick with tarps is to make sure they are pulled tight so the water doesn’t pool and that it doesn’t flap around in the wind. You also want to make sure that the water runoff from the tarp doesn’t land on your tent where it could leak.
RELATED: Toronto to Thunder Bay: a 10-day Northern Ontario road trip along Lake Superior’s spectacular coast
Set up your sleeping station
If you have a vestibule or covered front area of your tent, you can place an outdoor mat there to keep out dirt and debris and a place to put your shoes. If you don’t have a covered area, then you can do put the mat on the inside of your tent, right at the door.
Next, unroll your sleeping pad or mattress and inflate. If you’ve got to inflate your air mattress or sleeping mad, this will take a little longer. I like to put a blanket down on top of the mattress for extra comfort. This can double as your outdoor blanket for sitting around the campfire on chilly nights.
Then, unfurl your sleeping bag and shake it out. You’ll want to fluff it out so the insulation can do its job correctly. Same with your pillow. Again, I love just to bring a bed pillow when car camping. Fluff it out and throw it on your bed.
Next, place your bag with your headlamp beside your bed, and you’ve got yourself a sweet sleeping set up!
Setting up your campsite
After you’ve set up the tent, the rest of it is pretty straightforward.
I’m not one to use shelters, I think they take up too much room in the car, but if you’re at a campsite longer than a weekend, you might want a reprieve from the sun, the bugs or the rain.
The picnic table at most campsites in Ontario will be your main space, a place to prepare food, eat, or play games. If you want to be a little cleaner, then a picnic table cover will help. If you’ve brought a water jug with a spout then, the picnic table bench is the perfect place to put it.
I always keep the cooler and any kitchen gadgets in my car, but easily accessible. It’s important to keep all food items out of sight and smell from wildlife.
You can unload your firewood, kindling and starter near the firepit, so it’s handy for when you want to start the fire. Also, unpack your chairs to be placed around the firepit.
After that, you really just need to think about where you will be keeping your garbage and your washing station (which can be your water jug, a tub and soap and sponge.
Pro tip: Keep your sponge with soap in a plastic baggie while you’re not using it, so it never gets dirty or gets anything else wet while it dries.
How to build a campfire
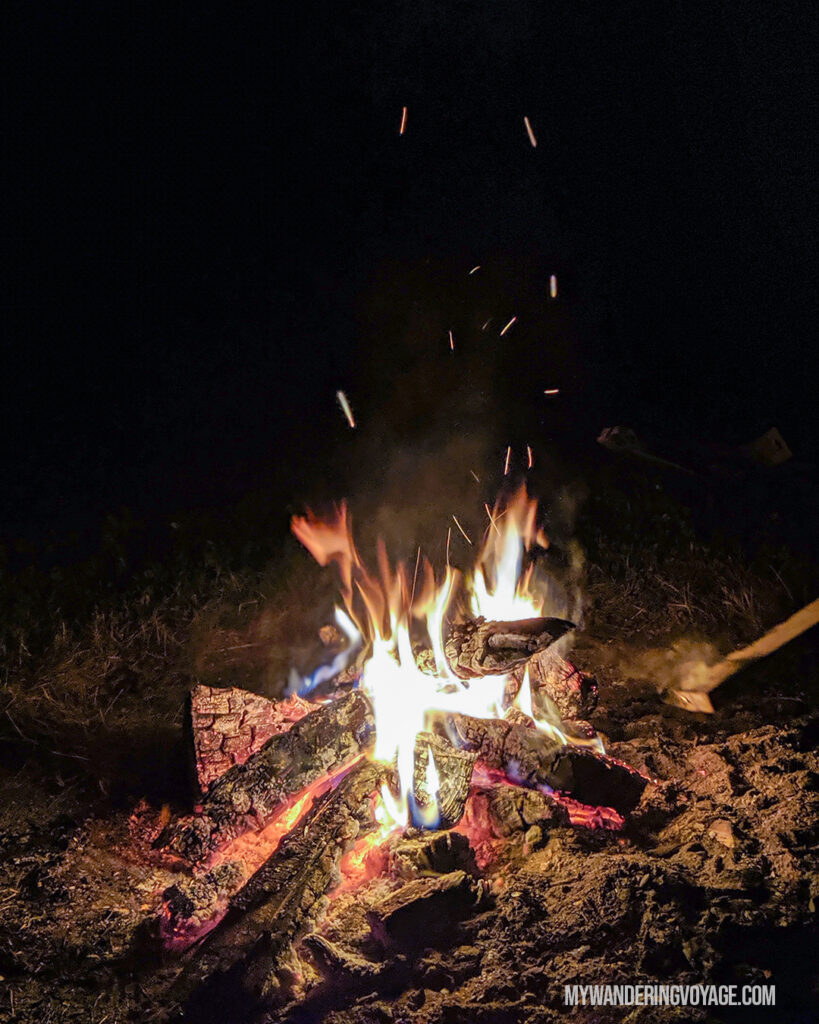
I think the part that scares people the most about setting up a campsite is building a fire. I think it’s because people think it’s easier to use a propane camping stove than it is to start a fire. And while I won’t disagree that camping stoves are simple to use, cooking over a campfire is just so much more fulfilling, and it gives your food a delicious smokey taste.
There are two things that a campfire needs: oxygen and fuel.
Fuel: This is the firewood that you purchase from the park store. You’ll need:
- Firestarter (like a lighter)
- Tinder (small flammable material like lint from your dryer, newspaper, tiny sticks, etc.)
- Kindling (small splits of wood about 2-3 inches thick)
- Firewood (larger logs)
Note: Most parks in Ontario prohibit you from bringing in outside firewood since it can spread disease and pests. Also, you’re not allowed to collect firewood or kindling at campsites because trees, both living and dead, are important to the ecosystem. Also, before you start a fire, make sure you check if there’s a fire ban or not. If there is, then a camping stove will have to be your option for cooking!
There are many ways to start a fire, but the best method I found is a mix between the “Log Cabin” and “teepee.” This provides the best airflow and best arrangement of fuel for your fire.
- First, arrange two large logs parallel to each other on either side of the middle of the fire.
- Next, place two kindling pieces perpendicular to the larger logs, but also on top of them, creating a bridge between the two logs.
- Place two more kindling logs on top of the larger logs, creating a log house shape
- Next, in the middle of the log house, place your tinder – like lint stuffed into an empty toilet paper roll, crumbled up paper and twigs.
- Then, place three of four kindling logs upright in the middle, so they lean on each other in the shape of a teepee.
- Then use your fire starter – like a lighter – to light the tinder. You may need to blow on the flames to get the kindling to catch on fire.
- As the kindling starts to burn away, place your larger logs on the fire, one or two logs at a time.
Remember, don’t leave your campfire unattended and keep it contained in the provided firepit! Spread the coals out to put out your fire, and slowly douse it with water until its cool to the touch to put out the fire entirely before you leave.
RELATED: Everything you need to know about Pukaskwa National Park [+ hiking guide]
Great camping recipes
I am a lazy cook, which is why I love camping recipes so much. Many of them are just a bunch of ingredients thrown together and put over the fire. Unless you are a master chef, then this beginner’s guide to camping includes five easy-peasy camping recipes that are perfect for everyone!
Six of my go-to recipes are campfire quesadillas, campfire pizza, campfire veggie foil packs, hotdog bannock, campfire apples and s’mores.
Campfires are the perfect way to cook your food, and it tastes so much better! Most campsites in Ontario have a firepit with a moveable grill that you can cook your food on.
Campfire Quesadillas
With the quesadillas, you just need tortillas, chicken (which you can get pre-cooked and pre-cut in the deli section), cheese and any veggie toppings you desire. If you’re vegan, then load it up with veggies and some vegan cheese. Throw it in some foil, then put it on the side of the grill, not directly over the fire. Make sure to spin it around and flip it often, so one area goes get burnt.
Campfire Pizza
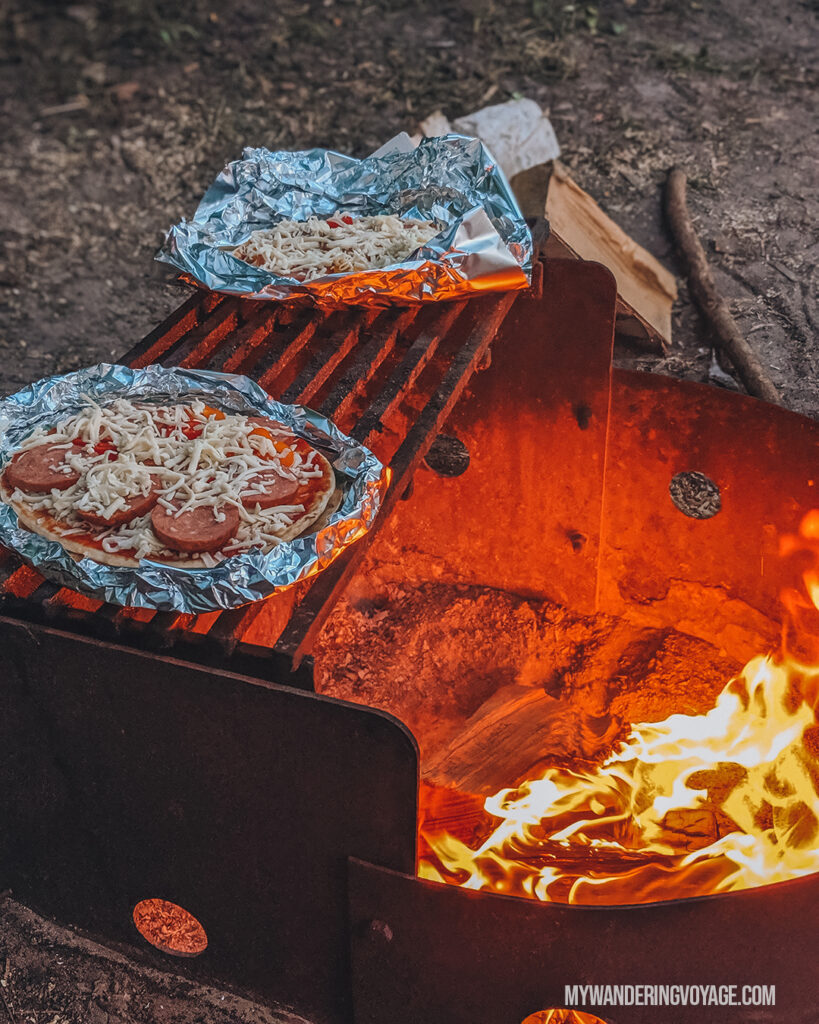
Take a piece of naan bread, spread some pizza sauce all over it and put any toppings you desire, like pepperoni, cheese, peppers, mushrooms, tomatoes, onions, olives or whatever else you fancy. Make a plate with two layers of tinfoil, with the edges turned up and place it on the side of the grill, not directly over the fire. Make sure to spin it so that it cooks evenly until the cheese is all melty.
Campfire veggie foil packs
One of my go-to camping recipes are foil packs. Take a layer of tin foil and put in baby potatoes, cut into quarters, chopped onion, carrots and mushrooms (and whatever other veggies you may like). Drizzle with olive oil and any spices you desire. Then fold the foil pack tightly so that it won’t leak. Take a second layer and wrap the first layer again. Place it on the grill, not directly over the fire. It takes about 20-30 minutes, depending on your fire. Make sure to flip it every 10 minutes or so.
Hotdog bannock
A classic and so good, bannock-wrapped hotdogs over the fire is just pure camping comfort food. First, at home mix together in a Ziploc bag
- 1 cup white flour
- 1 teaspoon baking powder
- ½ teaspoon salt
To make the dough at the campsite, add 1/2 cup water and 1 tablespoon vegetable oil. Then knead it in the bag until it becomes doughy.
Take a hotdog and spear it onto a roasting stick, then take a ¼ of the portion of bannock and wrap it around the hot dog. Stick the concoction over the fire until the bannock is golden brown. Top with ketchup, mustard or eat it plain.
Pro tip: Bannock is excellent over the fire as a savoury by adding herbs and cheese, or as a sweet by adding cinnamon and sugar.
Campfire baked apples
Take a cooking type apple – like Cortland, Granny Smith, Northern Spy and McIntosh. Use a corer to core and slice the apple. Put about a tablespoon of butter, a spoonful of brown sugar and a sprinkling of cinnamon and nutmeg. Then fold the apple into a double layer of foil and place it on the grill, not directly over the fire (or in the coals if your fire is low). It takes about 10-15 minutes. Place it in a bowl and peel away the foil layers. You’ll be able to use a spork to eat this delicious camping dessert.
S’mores
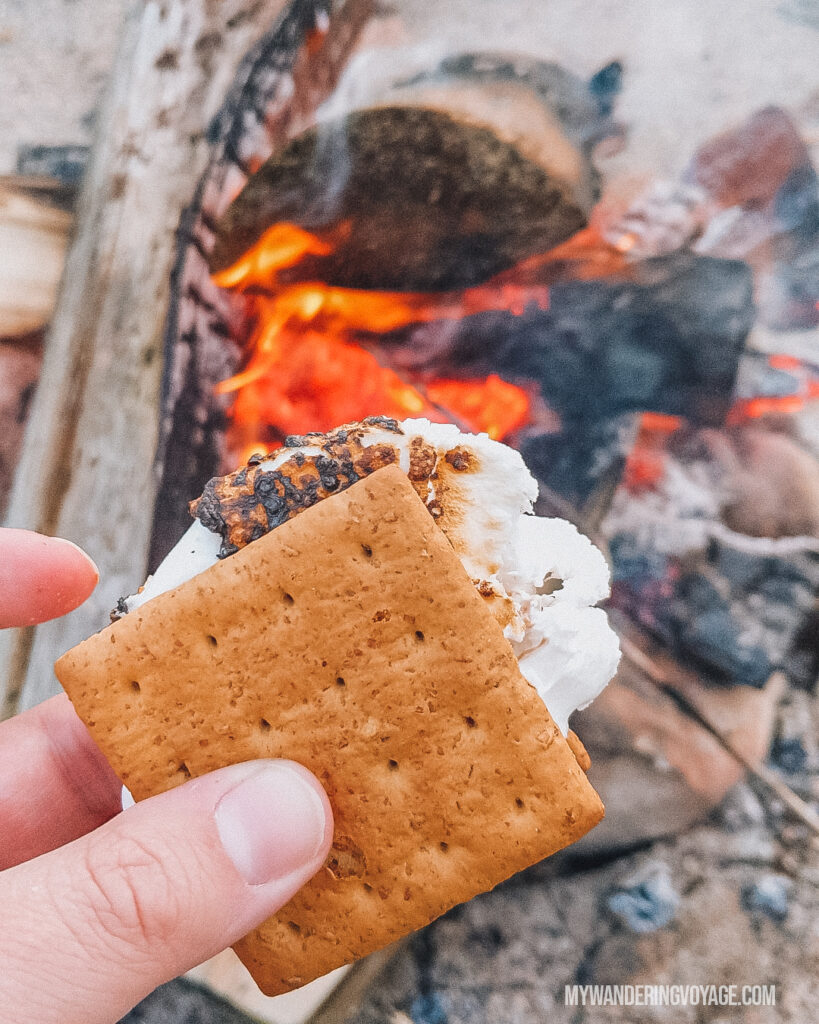
Chocolate, toasted marshmallow and graham crackers? What’s not to love. Pro tip: Use a chocolate-covered cookie to make it meltier. Pro tip 2: get low and put the marshmallows in the coals, rather than over the flames!
Showers and bathrooms while camping
One big hesitant people have about camping is the shower and bathroom situations at parks. I get it, that’s why I’m talking about it in this beginner’s guide to camping. From the comfort of home, a less-than-ideal shower or bathroom can put people off. I used to hate it too until I became a little more confident camping.
I was taught how to pee in the woods at a young age, and it’s necessary when I’m on a long hike. So, know that outhouses and comfort stations at most parks in Ontario are miles better than that.
Outhouses: Most campsites have this type of toilet. Some are pit latrines, where waste is dropped into a hole in the ground. Some are composting toilets. Yes, they smell. Yes, there are usually bugs or spiders inside. But they work. Trust me when you’ve got to go, you’ve got to go. When I went winter camping in Silent Lake Provincial Park, it was -35 with the windchill, and the toilet seat of the outhouse was frosted over. Still had to go.
Comfort Stations: Many provincial parks have what they call comfort stations, where they have bathroom stalls, mirrors, running water and electricity. There are also individual shower stalls to wash up in.
When comfort stations are closed, like in winter or during the crazy year that is 2020, you might think that you’ll be able to use a solar shower or jump in the lake with some shampoo. You would be wrong. Ontario Parks outlined why you can’t do any of that in their post.
A word about biodegradable soap
To reiterate what Ontario Parks says about biodegradable soap, It is not safe to use in a lake or river.
Biodegradable soap can’t break down properly in a waterway and are an additive to the ecosystem. They have the potential to upset the natural balance and impact drinking water.
You can, however, jump into the lake with a washcloth to remove dirt and sweat. But, if you can’t go a couple of days without a proper shower, then I suggest shortening your stay or not going. Look, nature is dirty and messy. Staying clean outside will take some time, but you might even realize it’s not that bad!
RELATED: The Ultimate Guide to National Parks in Ontario
Before you go to sleep
Before you head off to dreamland, there are a couple of things you’ll want to do that I want to talk about in this beginner’s guide to camping. First, take a trip to the washroom. An empty bladder will keep you warmer at night. Second, douse the fire and spread around the coals.
And lastly, lock up your valuables and put away your food, toiletries, cooking utensils and garbage in your car. Wildlife is more active at night, and you don’t want any critters getting into your goods while you’re sleeping.
I once left my Harry Potter book outside at night, and I woke up to a muddy raccoon footprint on the inside cover.
Camping etiquette
Camping etiquette is learned, so that’s why it’s in this beginner’s guide to camping. When you’re out in nature, you’re not only sharing the space with flora and fauna; you’re also sharing with other nature lovers. That’s why it’s vital to know camping etiquette and to be as respectful as you can.
- Know the rules of the park: Some parks don’t allow drinking on long weekends, some require dogs to stay away from beaches. Ask about the rules when you check-in and follow them.
- Don’t cut through other people’s campsites, that’s just rude
- Make sure you put your food away properly do you don’t attract wildlife
- Observe quiet hours, which may range depending on what park you’re in.
- Respect nature: don’t peel bark, don’t try to touch the wildlife, don’t litter and don’t be a wiener to the environment, okay?
- Leave no trace: Leave the campsite in better condition than when you arrived. Even better, if you have extra firewood that you didn’t burn, keep it next to the fire pit for the next user.
What to do when you get home
A successful camping trip doesn’t end when you get home, oh no, you’ve got to put your gear away correctly so that when you go to use it next time, it won’t be ruined.
Tent: The tent is important to put away correctly. Moisture and debris can cause more wear and tear on your tent, so make sure to clean it and dry it out when you get home. I like to do that by setting up the tent on my front lawn, take a shop vac to the inside and let it sit in the afternoon sun to dry before taking it down and putting it away.
Sleeping bag: generally, just turning your sleeping bag inside out and shake it out is good enough to keep it clean. But if you use it for much longer, you may want to wash it. The best way to do that is to follow the instructions on the tag.
Cooking gear: Wash all your cooking equipment, like the utensils, dishes, cups and pots and pans. Even wipe down your stove! If you have a cast-iron skillet, make sure to treat that correctly when you get home too.
Once everything is clean and dry, you can pack it up into a sealed tote (or two) and store it until your next trip. Use one tote for the sleeping set up and another tote for your camp kitchen.
This beginner’s guide to camping covers it all, from camping etiquette, how to pack for camping, how to set up your campsite, car camping essentials and more. After you read it, you won’t be a beginner anymore! So, go out and enjoy this quintessential Canadian pastime.